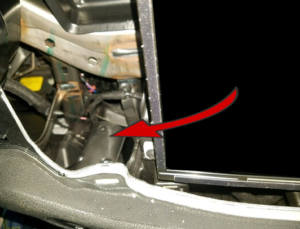
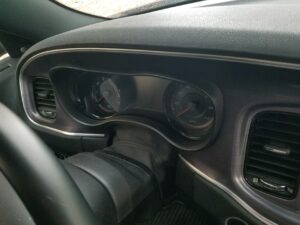
Step 1 – Using a pry tool, carefully remove the plastic dash. A plastic pry tool is recommended.
(Charger dash shown in pic)
Step 1
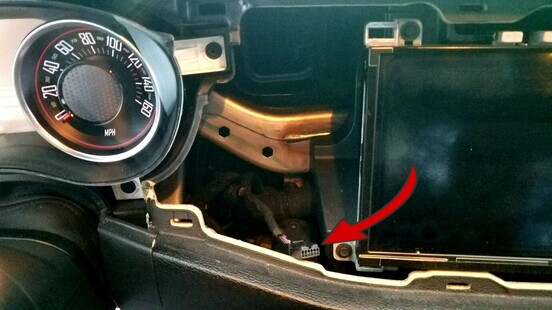
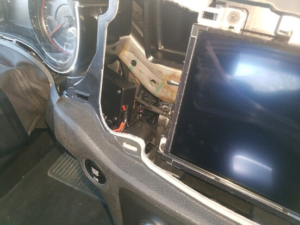
Step 2 – With the plastic dash removed, the ‘Push to Start’ component is viewable (see Step 2A pic).
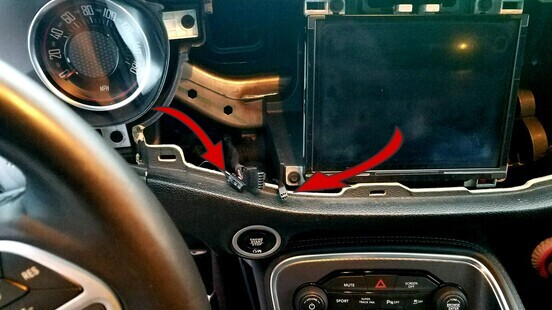
Reach behind the ‘Push to Start’ component and remove the connector downwards (see Step 2B pic).
Step 2A
Step 2B
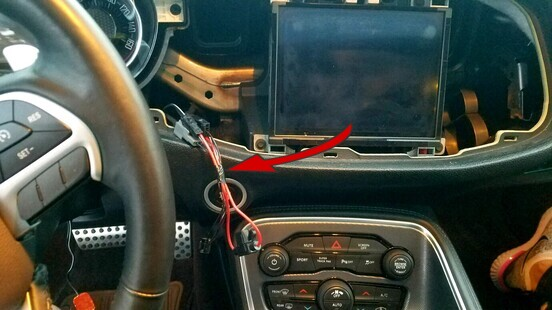
Step 3 – Extend the factory connector and wire out of the dash.
Step 3
Step 4 – Detailed instructions are included with the kit for installing the 2 switches (along with suggested locations). Bring the ends of the 2 separate switch connectors out of the dash. The Stage 1 and Stage 2 switch connectors are different and also have a different color.
Step 4
Step 5 – Connect the ‘Plug and Play’ harness to the factory wire connector and the 2 switch connectors . Each connector is different so there’s no chance of incorrect assembly.
Step 5
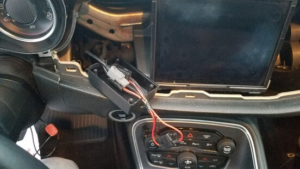
Step 6 – Lay the 3 connectors into the security box (see Step 6A pic).
Snap the cover on the security box and, using the included ‘anti-tamper’ driver bit and screws, fasten the cover. (see Step 6B pic).
While this step is completely optional, it adds one extra layer of deterrence to a thief.
Step 6A
Step 6B
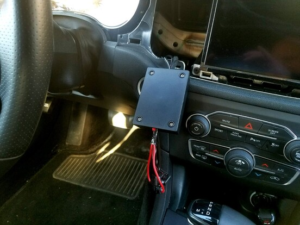
Step 7 – Tuck the security box inside the dash (see Step 7A pic).
Reach inside and plug the remaining connector from the ‘Plug and Play’ harness into the back of the ‘Push to Start’ component. (see Step 7B pic.)
(Charger dash shown in pics)
Step 7A
Step 7B
Step 8 – Reinstall the plastic dash.
Congratulations on making your vehicle significantly guarded against theft !!